HarmonyOS PC 命令行工具构建框架
本文介绍了HarmonyOS PC命令行工具构建框架,主要功能包括自动化交叉编译环境配置、生成HNP格式安装包、支持批量构建组件等。详细说明了Windows(WSL)、Linux(Ubuntu 22.04)和macOS环境准备步骤,提供从SDK下载、环境配置到构建执行的完整流程。特别以tree工具为例,展示如何创建构建脚本、编译安装及打包过程,最后还包含项目结构说明和贡献指南。适用于开发者将开源命
欢迎大家一起共建 HarmonyOS PC 生态! 🚀
欢迎加入开源鸿蒙PC社区:https://harmonypc.csdn.net/
目录
概述
本仓库是 HarmonyOS PC 命令行工具构建框架,用于将 Linux/Unix 命令行工具适配并构建为 HarmonyOS Native Package (HNP) 格式。
主要功能
- 🔧 自动化交叉编译环境配置
- 📦 生成 HNP 格式安装包
- 🔄 支持批量构建多个组件
- 🛠️ 统一的构建流程和规范
适用场景
- 将开源命令行工具移植到 HarmonyOS PC
- 为 HarmonyOS PC 生态贡献工具
- 学习和研究 HarmonyOS 原生应用构建
编译运行实际效果图
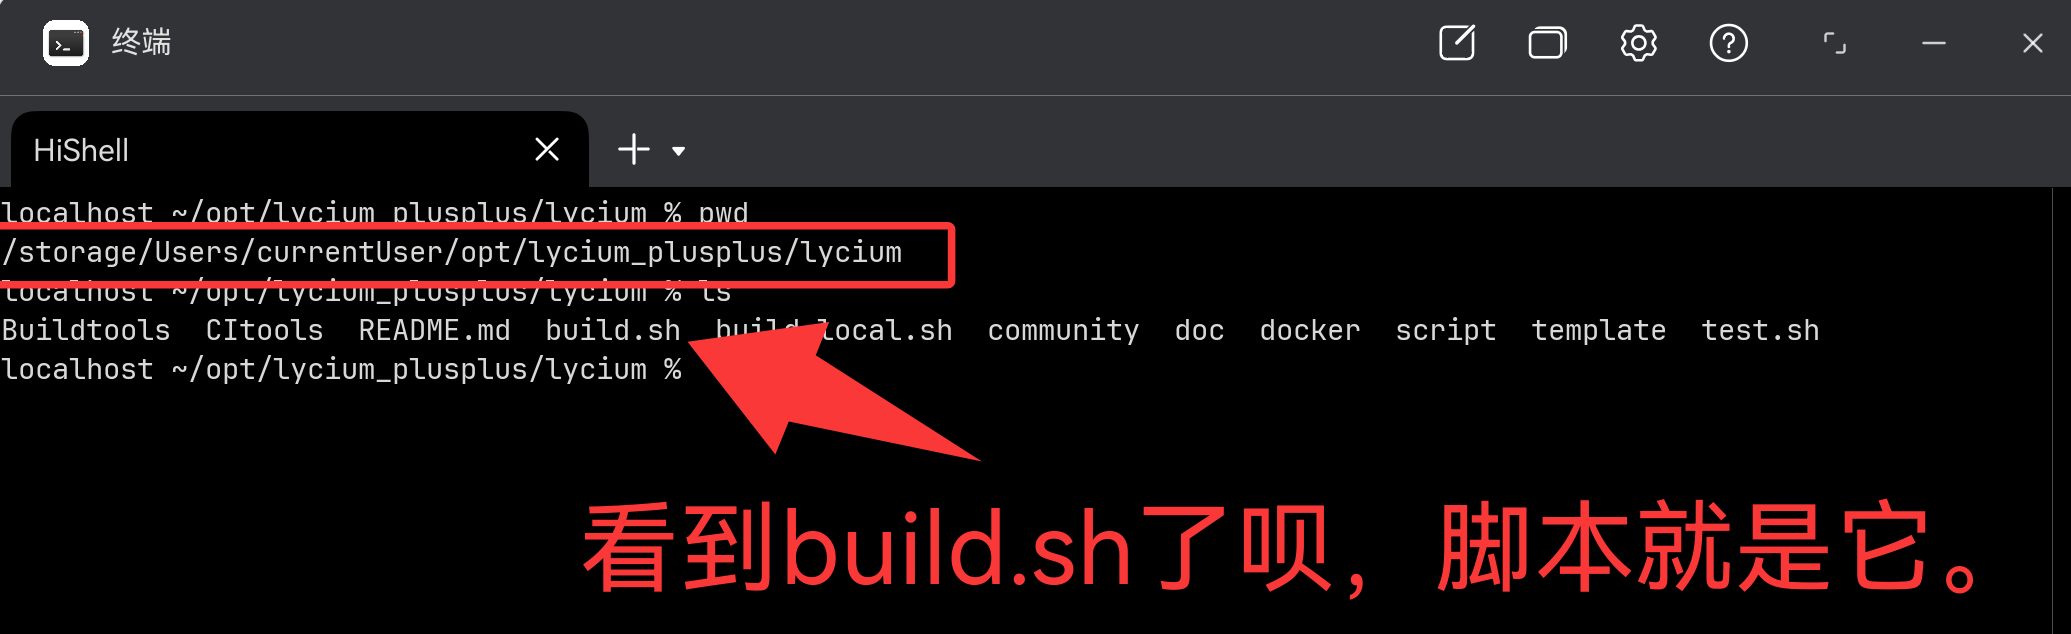

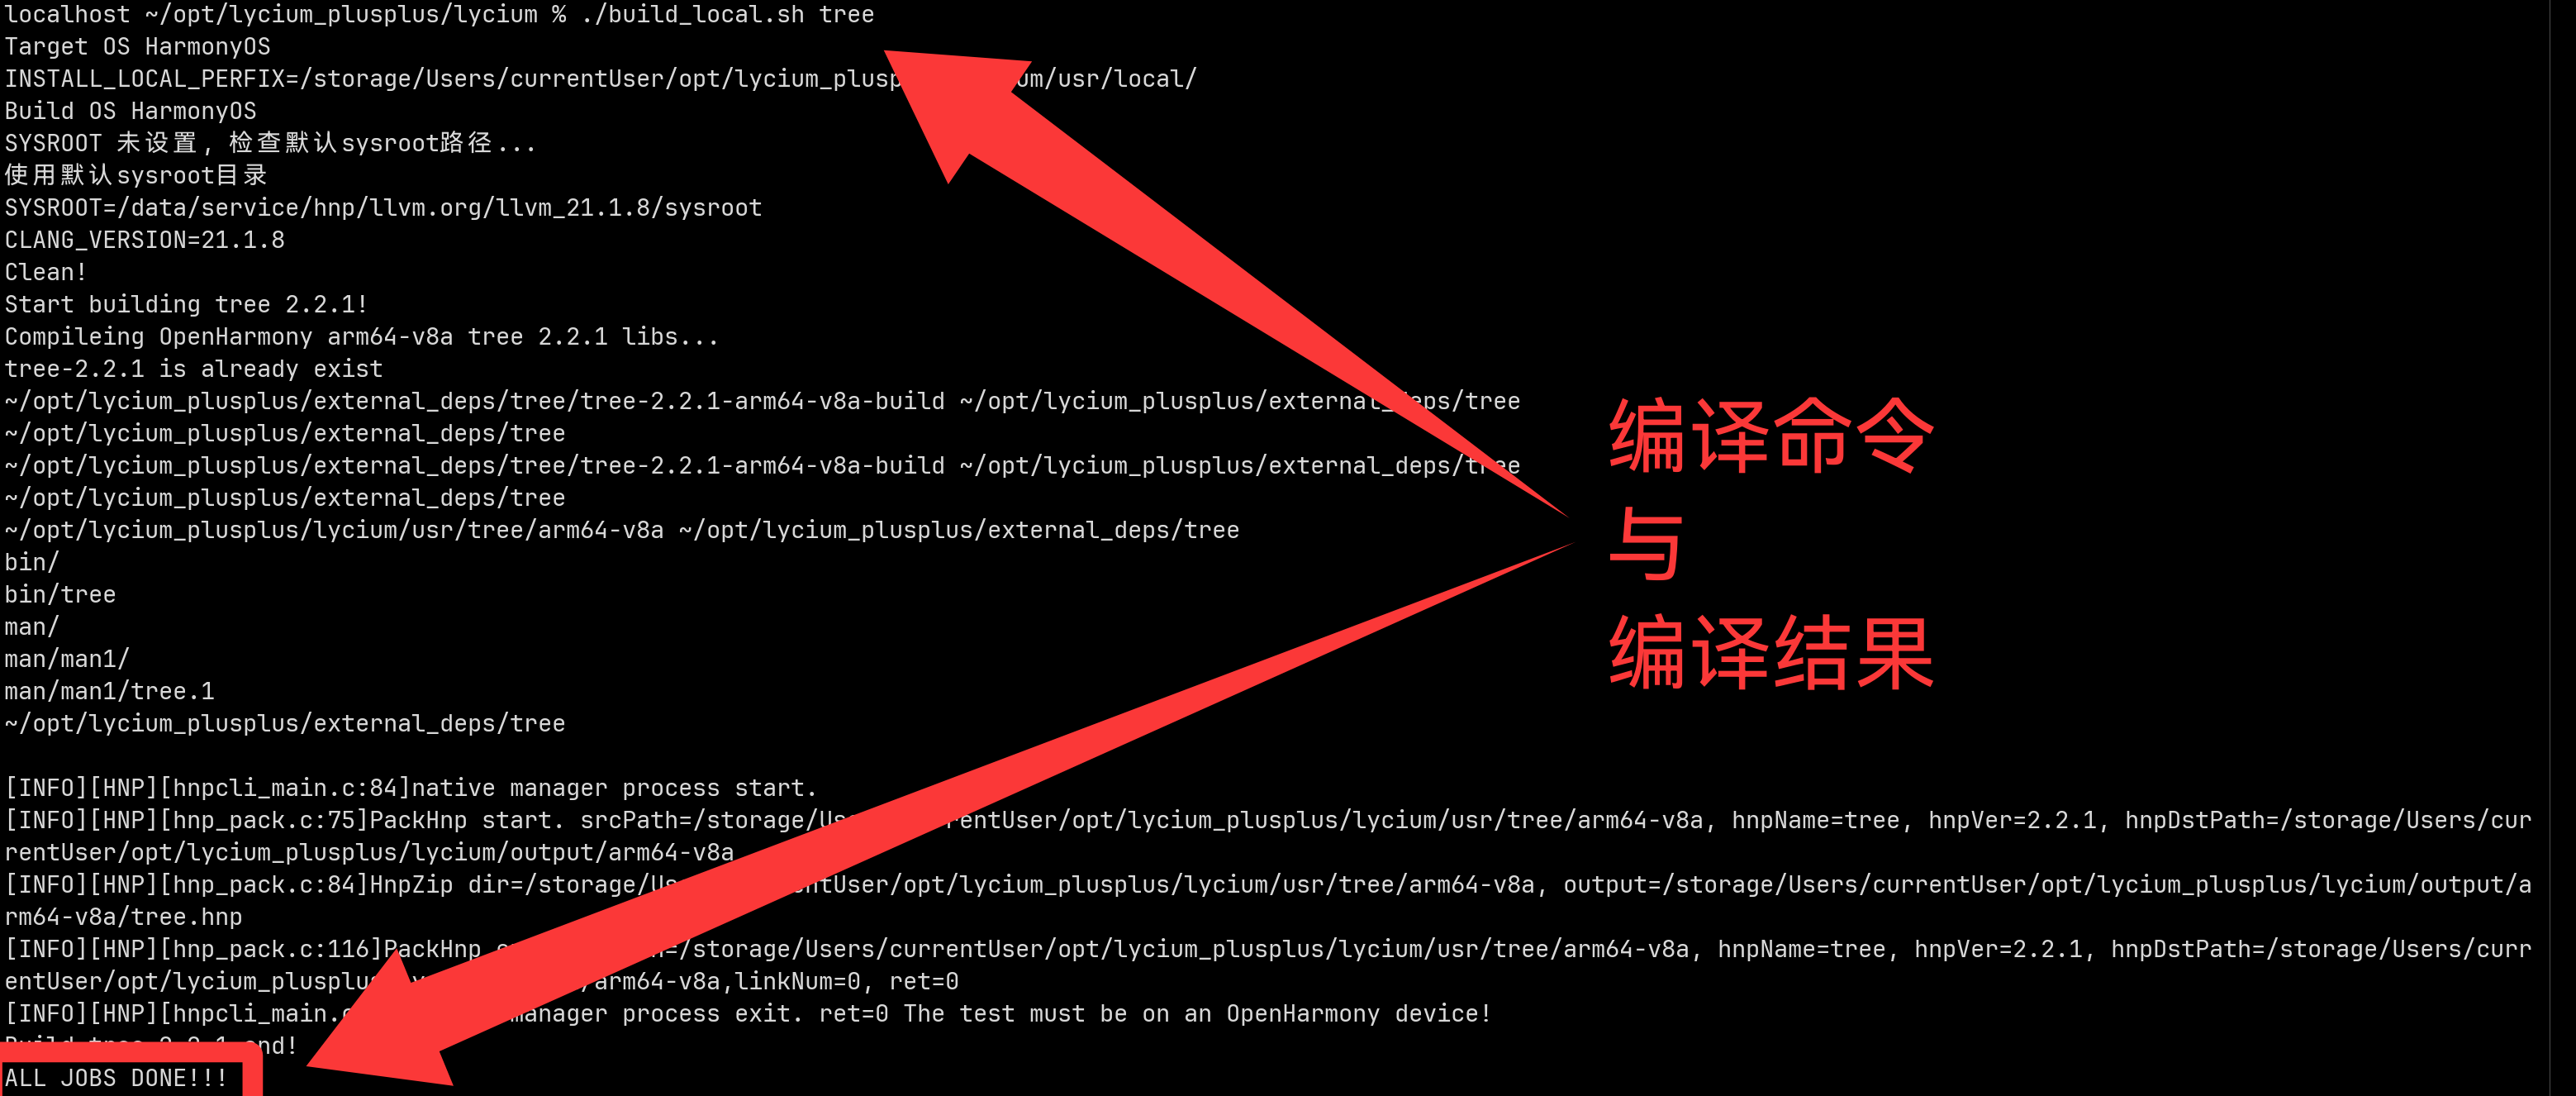
最终测试效果·成功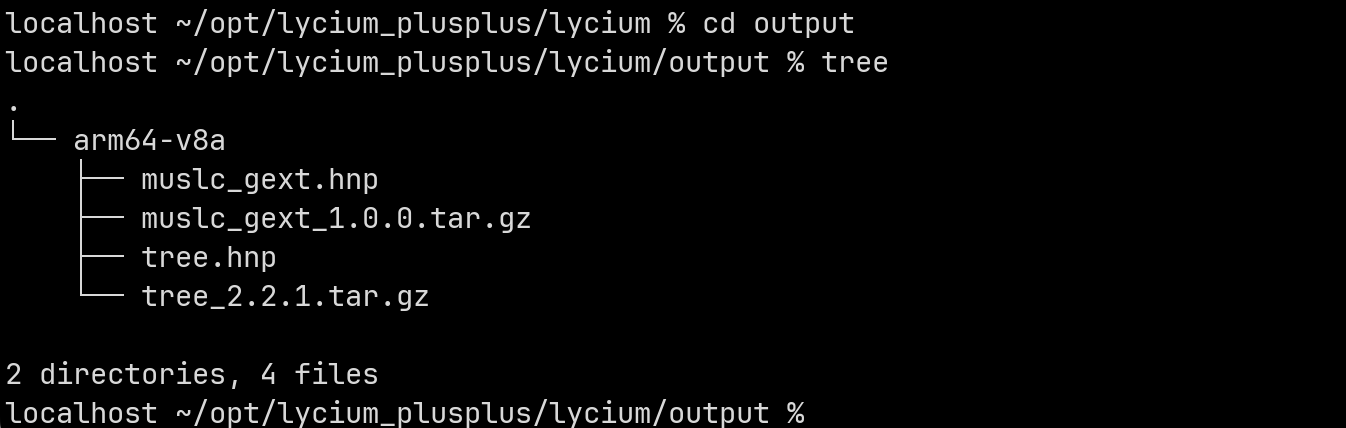
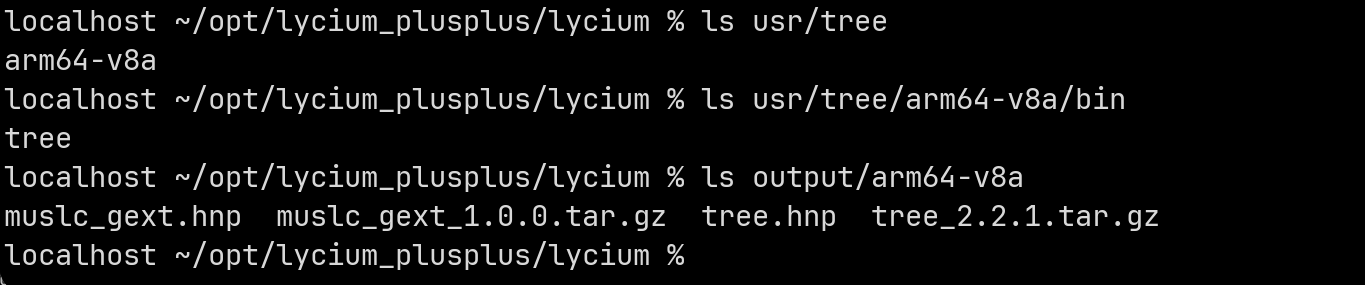
多层级测试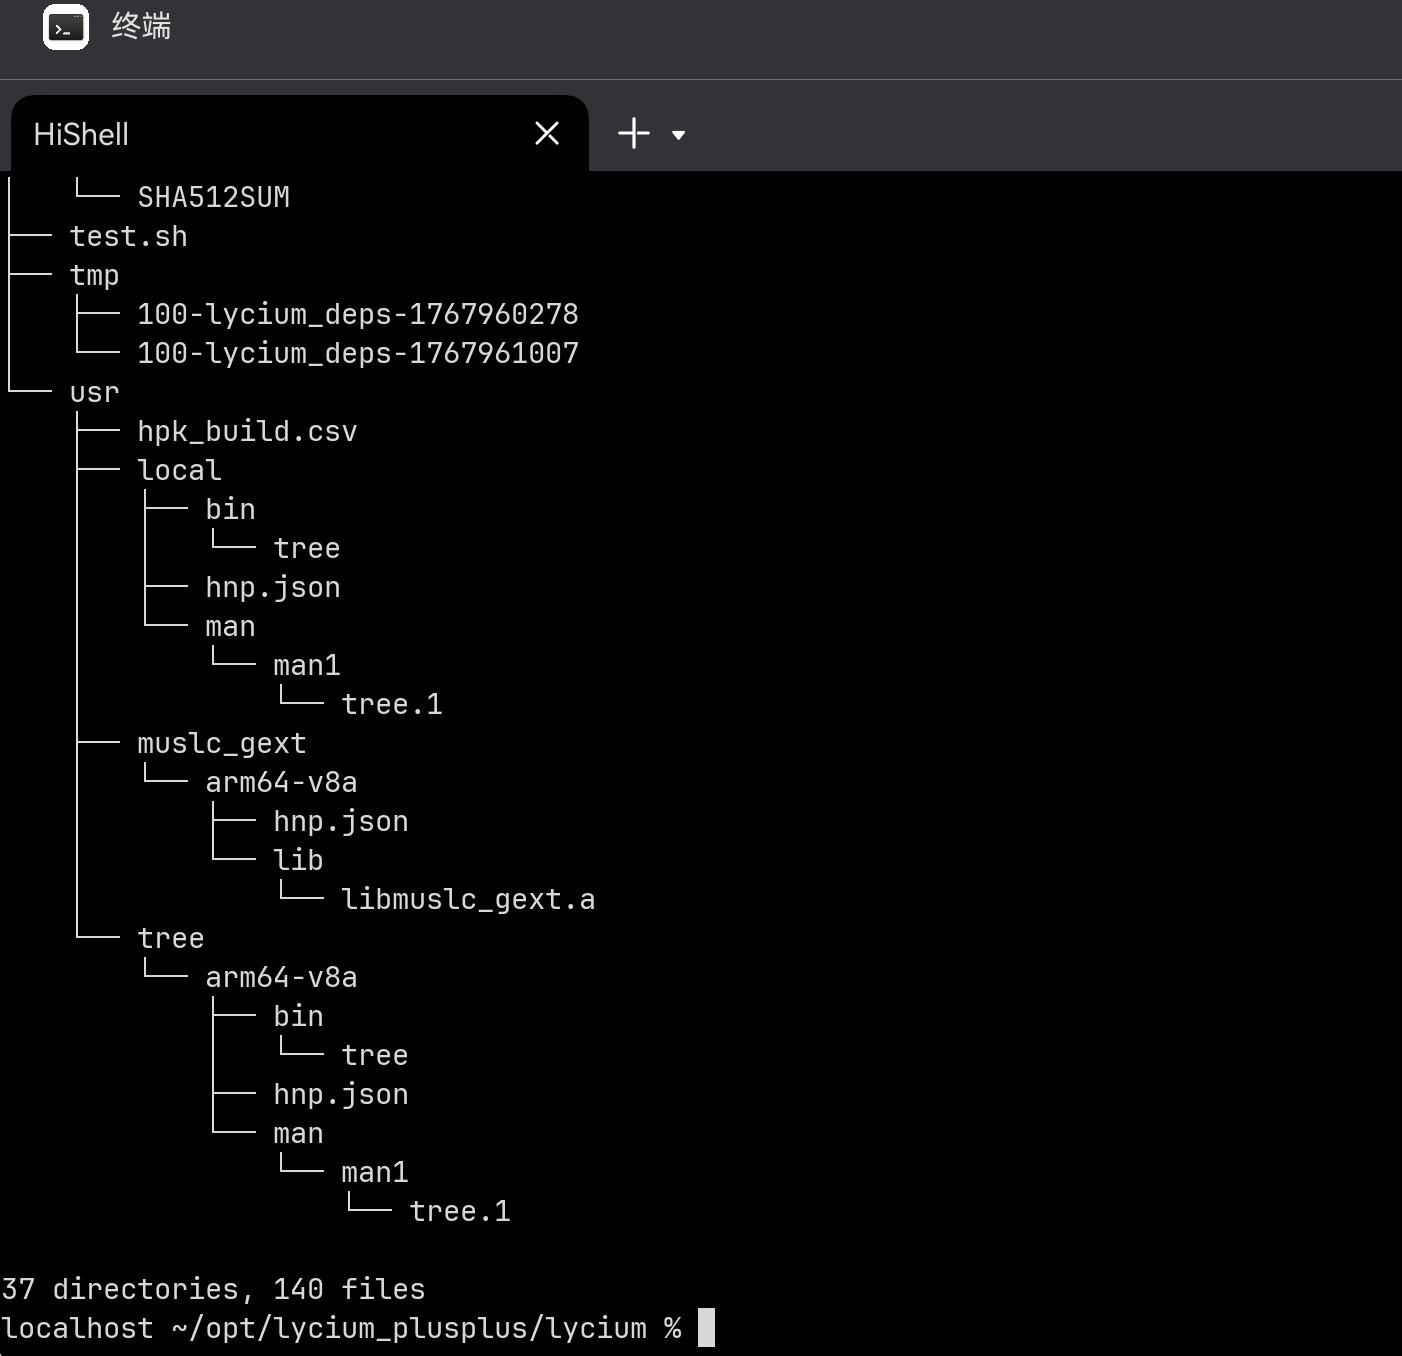
真机环境
环境准备
Windows 环境(WSL)
1. 安装 WSL Ubuntu 22.04
下载并安装 WSL Ubuntu 22.04:
下载地址:
https://wslstorestorage.blob.core.windows.net/wslblob/Ubuntu2204-221101.AppxBundle
安装步骤:
- 下载
.AppxBundle文件 - 双击安装
- 安装完成后,在开始菜单中启动 Ubuntu 22.04
- 首次启动会提示创建用户账户
2. 进入 WSL 环境
安装完成后,可以通过以下方式进入 WSL:
# 方式 1:在开始菜单中启动 Ubuntu 22.04
# 方式 2:在 PowerShell 或 CMD 中执行
wsl
Linux 环境(Ubuntu 22.04)
如果您的系统是 Ubuntu 22.04,可以直接使用。其他 Linux 发行版需要安装相应的依赖。
macOS 环境
macOS 环境可以直接使用,但需要确保已安装必要的工具。
快速开始
前置要求
- Ubuntu 22.04(WSL 或原生系统)
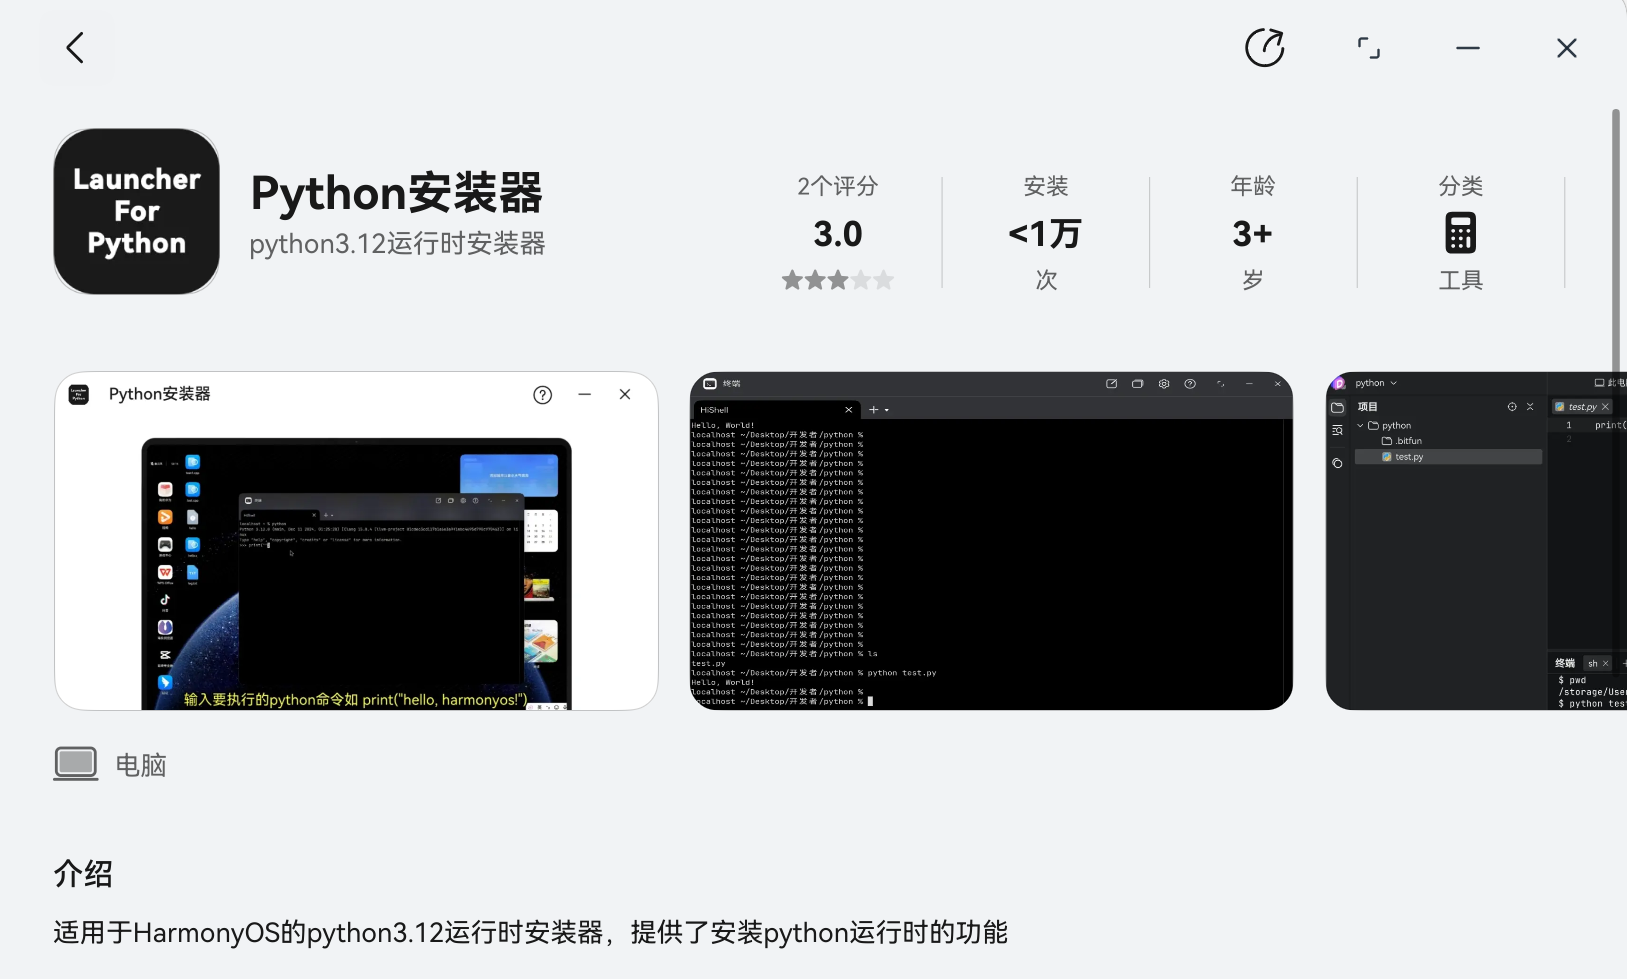
- Python 3.x
- Git
- HarmonyOS SDK
一键安装脚本
# 1. 克隆仓库
git clone https://gitcode.com/OpenHarmonyPCDeveloper/build
cd build

# 2. 配置 SDK 路径(替换为您的 SDK 路径)
export OHOS_SDK=/path/to/ohos-sdk/linux

# 3. 执行构建(以 tree 工具为例)
./build.sh --sdk $OHOS_SDK

详细步骤
步骤 1:环境配置
1.1 修改镜像源(可选,推荐)
为了提高下载速度,建议将 Ubuntu 源改为国内镜像:
# 备份原始源文件
sudo cp /etc/apt/sources.list /etc/apt/sources.list.bak

# 编辑源文件
sudo vim /etc/apt/sources.list
阿里云镜像源配置(Ubuntu 22.04 Jammy):
deb https://mirrors.aliyun.com/ubuntu/ jammy main restricted universe multiverse
deb-src https://mirrors.aliyun.com/ubuntu/ jammy main restricted universe multiverse

deb https://mirrors.aliyun.com/ubuntu/ jammy-security main restricted universe multiverse
deb-src https://mirrors.aliyun.com/ubuntu/ jammy-security main restricted universe multiverse

deb https://mirrors.aliyun.com/ubuntu/ jammy-updates main restricted universe multiverse
deb-src https://mirrors.aliyun.com/ubuntu/ jammy-updates main restricted universe multiverse

# deb https://mirrors.aliyun.com/ubuntu/ jammy-proposed main restricted universe multiverse
# deb-src https://mirrors.aliyun.com/ubuntu/ jammy-proposed main restricted universe multiverse

deb https://mirrors.aliyun.com/ubuntu/ jammy-backports main restricted universe multiverse
deb-src https://mirrors.aliyun.com/ubuntu/ jammy-backports main restricted universe multiverse
更新软件包列表:
sudo apt-get update
sudo apt-get upgrade
1.2 安装 Python
# 安装 Python 3 和 pip
sudo apt install python3 python3-pip

# 设置 python 命令指向 python3(可选)
sudo update-alternatives --install /usr/bin/python python /usr/bin/python3 1

# 验证安装
python --version
1.3 安装其他必要工具
# 安装 Git(如果未安装)
sudo apt install git

# 安装构建工具
sudo apt install build-essential
步骤 2:SDK 准备
2.1 下载 HarmonyOS SDK
# 进入用户目录
cd ~

# 下载 SDK(请替换为最新版本的下载链接)
wget https://cidownload.openharmony.cn/version/Master_Version/ohos-sdk-full_ohos/20250819_020817/version-Master_Version-ohos-sdk-full_ohos-20250819_020817-ohos-sdk-full_ohos.tar.gz

# 解压 SDK
tar -zvxf version-Master_Version-ohos-sdk-full_ohos-20250819_020817-ohos-sdk-full_ohos.tar.gz
2.2 解压工具链
# 进入 SDK 目录
cd ~/ohos-sdk/linux

# 解压 native 工具链
unzip native-linux-x64-6.0.0.46-Beta1.zip

# 解压工具链
unzip toolchains-linux-x64-6.0.0.46-Beta1.zip
注意:native-linux-x64-6.0.0.46-Beta1.zip 解压所在的父目录的全路径即为后续构建所需的 SDK 路径。
示例 SDK 路径:/home/goblinrs/ohos-sdk/linux
2.3 验证 SDK
# 检查 SDK 目录结构
ls -la ~/ohos-sdk/linux/

# 应该包含以下目录:
# - native/
# - toolchains/
步骤 3:下载构建框架
# 克隆构建框架仓库
cd ~
git clone git@gitcode.com:OpenHarmonyPCDeveloper/build.git

# 进入构建目录
cd build
步骤 4:添加组件源码
以 tree 工具为例:
# 创建代码目录(如果不存在)
mkdir -p code

# 进入代码目录
cd code

# 克隆组件源码
git clone git@gitcode.com:OpenHarmonyPCDeveloper/cmdtree.git -b master

# 返回构建根目录
cd ..
步骤 5:创建构建脚本
5.1 创建 build_ohos.sh
在组件源码目录下创建 build_ohos.sh 文件:
文件位置:code/cmdtree/build_ohos.sh
文件内容:
#!/bin/bash

# 设置 HNP 安装路径
# 路径规则:${HNP_PUBLIC_PATH}/<部件名称>.org/<部件名称>_<版本号>
export TREE_INSTALL_HNP_PATH=${HNP_PUBLIC_PATH}/tree.org/tree_2.2.1

# 保存并临时修改 PREFIX
sys_prefix=${PREFIX}
export PREFIX=${TREE_INSTALL_HNP_PATH}
echo "${PREFIX}"

# 清理构建
make clean

# 编译(注意:这里不需要传递 prefix 参数)
make VERBOSE=1

# 安装
make install

# 复制 HNP 配置文件
cp hnp.json ${TREE_INSTALL_HNP_PATH}/

# 打包
pushd ${TREE_INSTALL_HNP_PATH}/../
    ${HNP_TOOL} pack -i ${TREE_INSTALL_HNP_PATH} -o ${ARCHIVE_PATH}/
    tar -zvcf ${ARCHIVE_PATH}/ohos_tree_2.2.1.tar.gz tree_2.2.1/
popd

# 恢复 PREFIX
export PREFIX=${sys_prefix}
重要说明:
- HNP 路径必须遵循规范:
${HNP_PUBLIC_PATH}/<组件名>.org/<组件名>_<版本号> - 示例:
${HNP_PUBLIC_PATH}/tree.org/tree_2.2.1 make命令不需要传递prefix参数,因为已经通过环境变量PREFIX设置
5.2 创建 hnp.json
在组件源码目录下创建 hnp.json 文件:
文件位置:code/cmdtree/hnp.json
文件内容:
{
    "type": "hnp-config",
    "name": "tree",
    "version": "2.2.1",
    "install": {}
}
字段说明:
type: 固定为"hnp-config"name: 组件名称,必须与目录名一致version: 组件版本号install: 安装配置(可选)
5.3 组件源码结构示例
以 tree 工具为例,完整的源码结构如下:
cmdtree/
├── CHANGES
├── INSTALL
├── LICENSE
├── Makefile
├── README
├── TODO
├── build_ohos.sh      # 新增:构建脚本
├── hnp.json           # 新增:HNP 配置文件
├── color.c
├── doc/
│   ├── global_info
│   ├── tree.1
│   └── xml.dtd
├── file.c
├── filter.c
├── hash.c
├── html.c
├── info.c
├── json.c
├── list.c
├── strverscmp.c
├── tree.c
├── tree.h
├── unix.c
└── xml.c
步骤 6:源码适配
根据具体工具的特点,可能需要进行 HarmonyOS 平台适配:
- 系统调用适配:HarmonyOS 使用 musl libc,某些系统调用可能需要调整
- 平台宏定义:使用
#ifdef __OHOS__进行平台特定代码 - 路径处理:确保路径分隔符和路径处理逻辑正确
参考示例:
步骤 7:执行构建
7.1 设置安装目录
# 创建 HNP 安装目录
sudo mkdir -p /data/service/hnp

# 设置权限(根据实际情况调整)
sudo chmod 777 -R /data/service/hnp
注意:如果使用 WSL,可能需要先创建 /data 目录:
sudo mkdir -p /data/service/hnp
sudo chmod 777 -R /data/service/hnp
7.2 执行构建
# 进入构建目录
cd ~/build

# 执行构建(替换为您的 SDK 路径)
./build.sh --sdk /home/goblinrs/ohos-sdk/linux
构建参数说明:
--sdk <路径>:指定 HarmonyOS SDK 路径(必需)
7.3 查看构建产物
构建成功后,产物位于 output/ 目录:
ls -lh output/

# 输出示例:
# -rw-r--r-- 1 user user 123K Dec 1 10:00 tree.hnp
# -rw-r--r-- 1 user user 456K Dec 1 10:00 ohos_tree_2.2.1.tar.gz
产物说明:
tree.hnp:HarmonyOS Native Package 格式,可直接在 HarmonyOS PC 上安装ohos_tree_2.2.1.tar.gz:传统压缩包格式,便于手动部署
项目结构
构建完成后的项目结构:
build/
├── build.sh                    # 主构建脚本
├── build_dependency.py         # 依赖构建脚本
├── dependency.json             # 依赖配置文件
├── README.md                   # 本文档
├── LICENSE                     # 许可证
├── code/                       # 源代码目录
│   └── cmdtree/                # tree 工具源码
│       ├── build_ohos.sh       # 组件构建脚本
│       ├── hnp.json            # HNP 配置文件
│       ├── Makefile            # 构建配置
│       └── *.c                 # 源代码文件
├── data/                       # 数据目录
│   └── service/
│       └── hnp/
│           └── tree.org/
│               └── tree_2.2.1/  # 安装目录
│                   ├── bin/
│                   │   └── tree
│                   ├── man/
│                   │   └── man1/
│                   │       └── tree.1
│                   └── hnp.json
└── output/                     # 输出目录
    ├── tree.hnp                # HNP 格式包
    └── ohos_tree_2.2.1.tar.gz  # tar.gz 压缩包
贡献指南
添加新组件
1. 准备组件源码
# 在 code 目录下克隆组件源码
cd code
git clone <组件仓库地址> <组件名>
2. 创建构建脚本
参考 步骤 5:创建构建脚本,创建 build_ohos.sh 和 hnp.json。
3. 进行源码适配
参考 步骤 6:源码适配,进行 HarmonyOS 平台适配。
4. 测试构建
# 修改 build.sh 中的 SPECIFIC_DIR
SPECIFIC_DIR="<组件名>"

# 执行构建
./build.sh --sdk <SDK路径>
5. 提交代码
5.1 提交组件代码
将适配后的组件代码提交到组件仓库:
cd code/<组件名>
git add .
git commit -m "适配 HarmonyOS PC 平台"
git push
5.2 添加到 dependency.json
在 dependency.json 中添加组件信息:
{
    "dependency": [
        {
            "name": "tree",
            "branch": "2.2.1_ohos",
            "url": "git@gitcode.com:OpenHarmonyPCDeveloper/cmdtree.git"
        },
        {
            "name": "<新组件名>",
            "branch": "<分支名>",
            "url": "<仓库地址>"
        }
    ]
}
5.3 提交到构建框架仓库
cd ~/build
git add dependency.json
git commit -m "添加 <组件名> 组件"
git push
贡献流程
- Fork 本仓库
- 创建特性分支:
git checkout -b feature/<组件名> - 提交更改:
git commit -m "添加 <组件名> 组件" - 推送到分支:
git push origin feature/<组件名> - 提交 Pull Request
常见问题
Q1: SDK 路径错误
问题:
Error: SDK path is not exist or no permossion: [/path/to/sdk]
解决:
- 检查 SDK 路径是否正确
- 确认路径有读取权限
- 验证 SDK 目录结构是否完整
Q2: 权限不足
问题:无法创建 /data/service/hnp 目录
解决:
# 使用 sudo 创建目录
sudo mkdir -p /data/service/hnp
sudo chmod 777 -R /data/service/hnp
Q3: Python 未安装
问题:
You need install python in your system
解决:
sudo apt install python3 python3-pip
sudo update-alternatives --install /usr/bin/python python /usr/bin/python3 1
Q4: Git 克隆失败
问题:git clone 失败,提示权限错误
解决:
- 配置 SSH 密钥:
ssh-keygen -t rsa -b 4096 -C "your_email@example.com" cat ~/.ssh/id_rsa.pub - 将公钥添加到 GitCode 账户
- 或使用 HTTPS 方式克隆:
git clone https://gitcode.com/OpenHarmonyPCDeveloper/build.git
Q5: 构建失败
问题:编译过程中出现错误
排查步骤:
- 检查环境变量是否正确设置
- 确认源码已进行 HarmonyOS 适配
- 查看详细编译日志:
make VERBOSE=1 - 检查依赖库是否完整
Q6: WSL 中无法访问 Windows 文件
问题:在 WSL 中无法访问 Windows 文件系统
解决:
WSL 可以通过 /mnt/ 访问 Windows 文件系统:
# 访问 C 盘
cd /mnt/c/

# 访问 D 盘
cd /mnt/d/
相关资源
- 适配鸿蒙PC命令行指南 - 详细的适配文档
- HarmonyOS 开发者文档 - 官方开发文档
- 社区讨论 - 加入社区讨论

赋能鸿蒙PC开发者,共建全场景原生生态,共享一次开发多端部署创新价值。
更多推荐
 30
30 0
0- 0


 已为社区贡献19条内容

所有评论(0)